Often we find that the earlier we tackle a problem, the easier it is resolved.
This is certainly so with cavities in teeth – they hardly ever go away, if we just wait, even though we might at times be tempted to believe that.
Fortunately most parents of small children are eager to handle any cavities they discover in their children’s teeth. But these teeth are often so small and cavities can not be easily discovered by the naked eye, especially if they develop between teeth – and flossing the teeth of a four-year old is not an easy task.
An additional factor in baby teeth is that cavities can develop rather quickly and virtually undetectable under the enamel. Only when this fragile outer shell collapses do they become obvious.
This might then look like this baby molar…
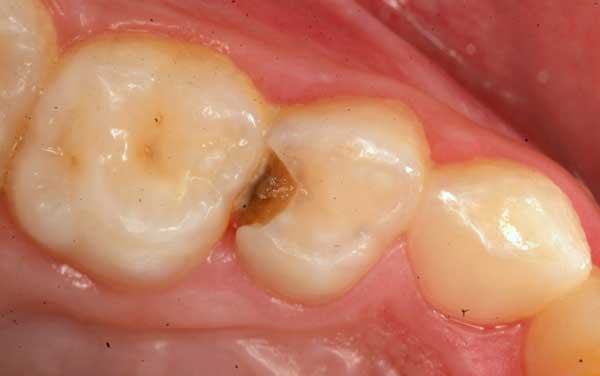
Decayed Primary Tooth: A cavity in a baby molar will look like this only if it is advanced. At this stage it has probably invaded the nerve (pulp) chamber and is in need of a laser pulpotomy.
If this is a tooth that would fall out very soon it could be removed to save the child from any possible tooth ache, but if this tooth is still needed to keep the space open for the permanent tooth to grow into, it need to be saved. Extracting the tooth and then using a spacer to maintain the opening for the new tooth would probably the more costly and way more inconvenient solution.
If we are in the fortunate situation that the majority of the pulp and nerve are still savable, a pulpotomy can be performed (see the graphical explanation).
The following sequence of images shows how this procedure is performed.
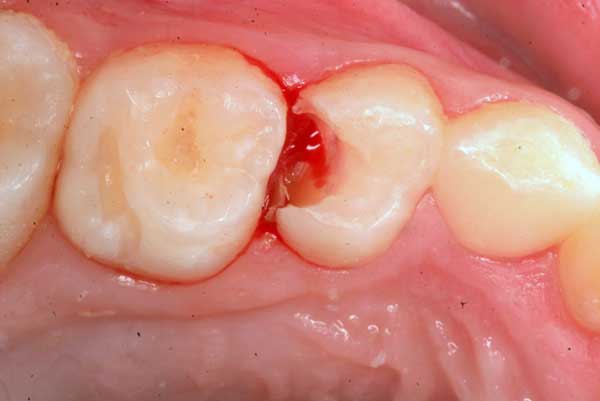
1. Decay has been cleaned out with a slow electric drill. There is bleeding from the gums as well as the nerve, which is exposed.
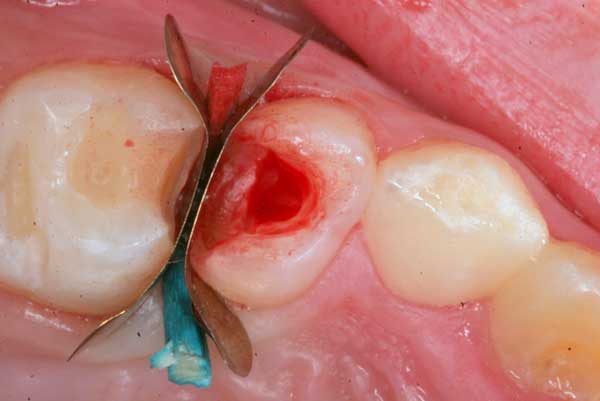
2. The tooth is sealed from the side with a “matrix” to prevent any blood or saliva creeping into the cavity during the following steps.
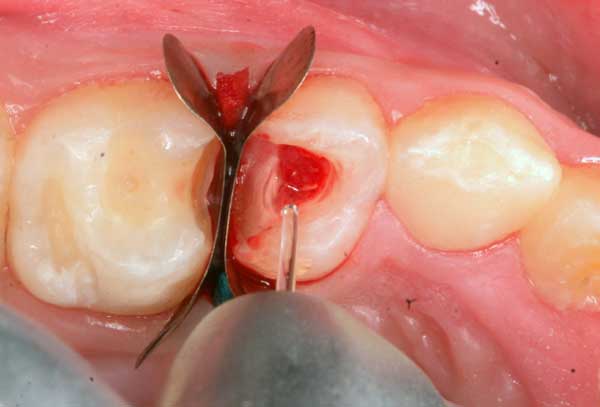
3. Laser energy is used to remove the nerve tissue from the pulp chamber (Waterlase at 2.25 W).
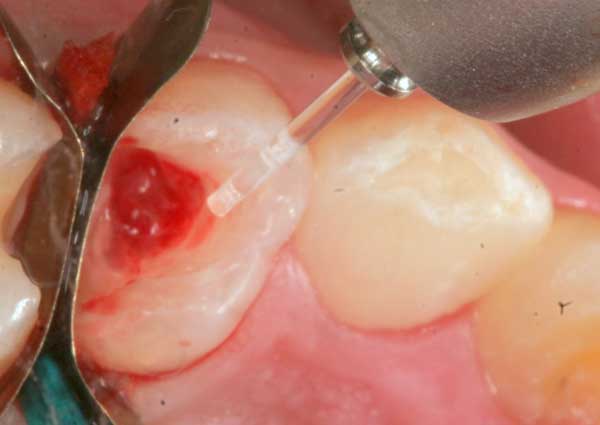
4. The laser is angled to completely remove nerve tissue from all the recesses of the chamber, to avoid future re-infection.
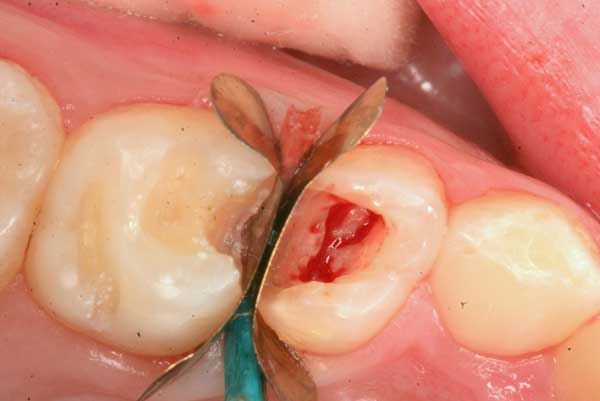
5. The openings into the canal are now visible with healthy and untraumatized nerve tissue left intact. Mild bleeding is very normal and indicates healthy tissue.
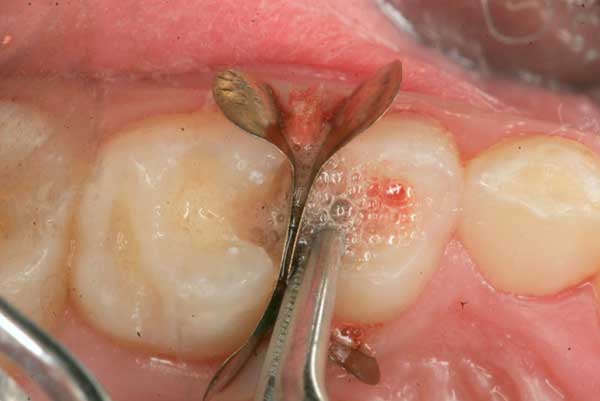
6. A mild 2-3% hydrogen peroxide solution is used to gently disinfect the chamber and stop bleeding before placing the MTA.
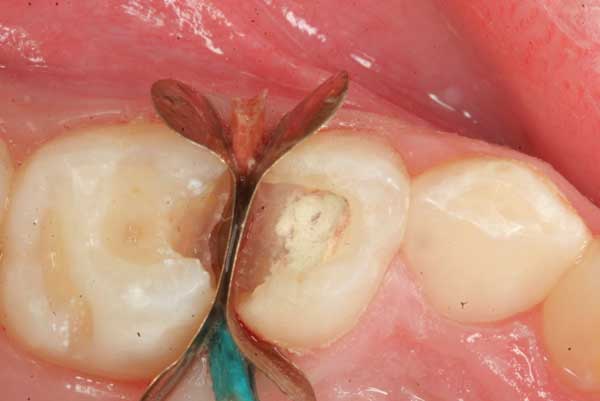
7. MTA (Mineral Trioxide Aggregate), a highly biocompatible cement is used to plug the openings to the canals. Very light pressure with a small cotton pellet is used to compact and dry it to avoid trauma to the nerve.
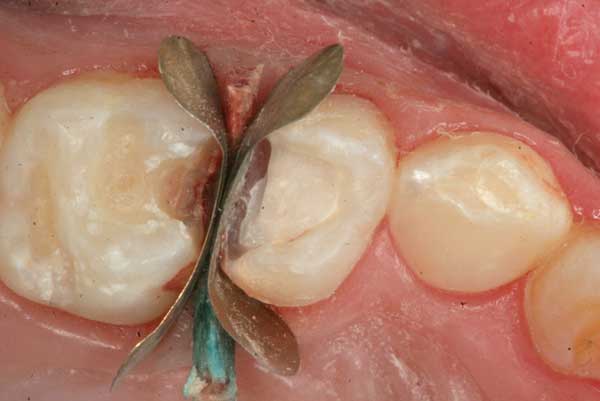
8. After making sure that there is no bleeding seeping through the MTA, this is now covered with a base of glass-ionomer cement.
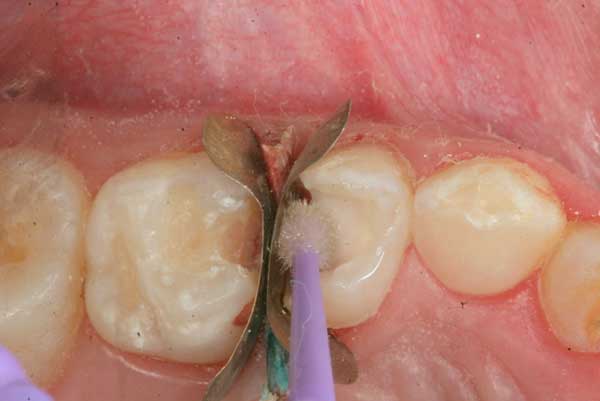
9. After the Glass-ionomer sets in 5 minutes, traces of MTA and cement lining the side walls and the margins are removed with a dry, slow bur. A self-etching bonding agent is applied with a micro-brush and dried after 30 seconds.
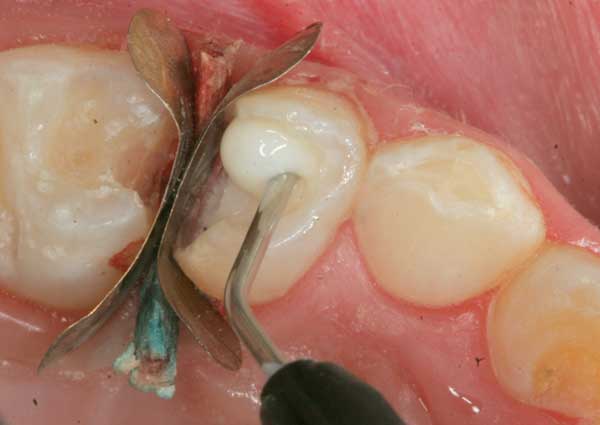
10. The cavity is now restored with a bonded composite using proper bonding principles.
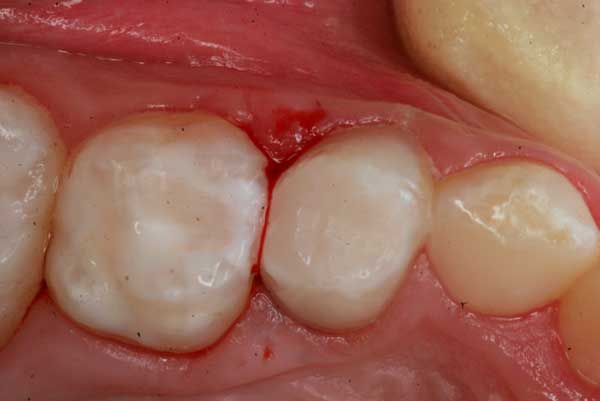
11. The final filling completed and polished. This tooth will survive for a few years until it is replaced with a permanent premolar.

Pingback: A ‘root canal’ for Baby Teeth | Homeopathic Dentistry
Very thorough.
I have 4 year old that had same molar with small side abscess that was previously treated with cavity freeze medicine. My question is since a day ago he developed abscess should we do root canal and save the tooth after infection is treated with antibiotics or extracting the tooth is better ??
This is a situation that is at least difficult to assess remotely. But the guiding principle should always be to avoid gaps in the bite, as this might malform the jaws.